Our research about the so called “swales” started with a problem: Due to the very dry summer, we had problems with getting water; It did not rain as much as expected and we could not use our wells in the way we were used to. Taking in account that we had to provide a garden made us thinking about ways to collect water in a more efficient way. Besides, on the area between greenhouse and walnut tree, there was a field which we did not use for anything. This field appeared as a slope which was very exposed to sunlight and the soil under the surface of dried grass was full of clay. This means, that water could run down very easily instead of being soaked by the ground. A field, not used, not capable of collecting water and showing nothing more than compacted ground?
At this moment the swales came into play.

A swale is made of the trench – the part which is dug into the earth – and the berm – the part which occurs as a bump made of ground. Usually, swales look like lines non-parallel to a slope in order to collect rainwater, which would run down if not stopped as in our case. If there are swales, the water fills the trench first and after sokes the ground of the downhill sided berm. Since the earth of the berm is not compacted, it can be used as a place for growing trees or other plants and their roots will be provided with water from the trenches.
With this method of collecting water passively, we hoped to firstly make use of rainwater, secondly loosen the compacted ground and finally find some new purpose for the field. On a longer term we planned to introduce a Forest Garden, using the water from the swales.
A very important thing to consider if you want to build swales is the following: At a slope, water will always run down at the steepest point. That means, that water will go where the land is at it´s lowest height. On a naturally field it is not said that the slope is always the same, but it varies, being more or less steep on different spots. If water shall be collected efficiently it is important, that the swales always follow the contour lines of a slope. Contour lines are the lines which follow the spots on the slope, that are all on the same height. Why is this important for swales? If there would be a slope inside of the trench running down to the left or right side of the field, water will not be distributed over the whole swale, but centralized on one spot: the lowest.
This leads to the first step of building swales: finding the contour lines.
An easy way to do this is to use a very simple tool, called the A-Frame (see picture below). This tool consists of three long pieces of wood, which are connected in the shape of an A. On the top of the A a rope is fixed, which is pulled down by a stone. The two feet of the A can be put on the field now. If they are on the same level, the rope will hang down exactly at the middle of the horizontal slat. Then we move the A around, finding the next point. Following this, we can make a mark at every point, that is on the same height. Connected, they show us the contour line. On this line (remember) water will stay and not flow down.


We marked the spots with some wooden sticks and connected them with rope. What was very interesting to see was, that the lines neither always were straight nor did they lead parallel to each other. This showed us, that the slope of our field varied on different spots.
Our swales should follow the contour lines. To make swales out of this lines we had to make some more measurements to define the place of the trench and the berm. We marked two more lines next to every contour line. One 80 cm uphill which would mark the edge of the trench, and one 120 cm downhill, defining the berm. Between the swales should be at least 2 m space to make it possible to grow trees and offer them enough place. So we had to make some arrangements, moving some lines up or down the hill. Finally, all our contour lines were set and the markings for trenches and berms were fixed. Let the digging begin.

But it was not just about making a ditch into the ground and putting the earth on a hill beside it. We had to follow some measurements in order to catch as much water as possible. The shape of the swale is shown in the graphic below.

Following this we had to dig the trench to a deep of 20 cm and to shape it a bit like a quadrant of a circle. The berm had to be 10 cm high.
Using  pickaxes, spades and shovels we started to dig out the ground and shape the berm. A method we used was to take off the layer of grass first and put it upside down at the place, where the berm should be. Like this, we ensured a stable base for the berm and avoided to have some grass growing, which would be in competition to our crop plants later.
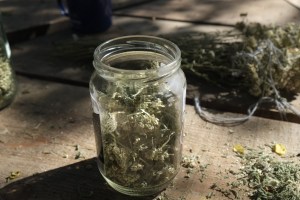
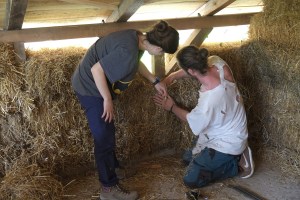
At the left and right end of every swale we led the berm around the swale to close it and to prevent water from running out. While digging we noticed that the colour of the ground changed. This can be a sign for a higher quantity of clay at some spots and can influence our decision later, which plants we want to grow where (see picture).
I mentioned, that it is very important that the bottom of the trench is always on the same level. So we had to use the A-Frame again and to dig at the places, where the bottom of the trench was too high. During this process we noticed two things: First we figured out, that the A-Frame had some limits, because it could only show us, if two points were at the same level. To bring the whole line on one height, we later used a level. Secondly we had to take care not to dig to much down at some spots, because this forced us to dig the whole bottom of the trench to this level. So we had to be careful and dig slowly. After this, the digging part was finished.
A thing we missed was to build a spillway, which could be useful when heavy rains appear. To prevent the water from over-floating, a so called sill can be dug into the berm to let the water out. This path can be blocked with a sand sack, leading parallel to the slope and which can be opened in case. This security can be imagined like a plug in a bath tub.
After finishing the swales it is important to observe them in a heavy rain to see how they work. In our case, we had some water gathering at several spots. This could mean that this spots were a bit lower or that the soil was more compressed or included more clay than on other spots. To solve this problem, the process of levelling can be repeated. Another observation we did was that the trenches are keeping snow longer then the flat ground around. This can be a sign, that the swales are stopping the airflow above the field and the cold air remains in the trenches.
 The last step was to fill the trenches. This did not mean putting soil back from the berm into the trench, but there are several other possibilities. If you want a path following the trench, the trench´s bottom can be covered with fabric and filled up with gravel until the top. In our example, we wanted to use the trenches to put plants. For this, the trenches can be filled with woodchips or with straw and rotten branches. We put first one layer of straw, then one layer of branches and on the top again some straw. Like this, the material will decompose during the next year, providing a good soil for planting and in the same time absorbing water better than the pure ground.
Now the trenches are ready for planting or using them for another purpose.
Bozevce, 01.03.2020


 Take a moment and picture yourself in a peaceful place up in the mountains surrounded by rolling green hills and tree filled valleys where the sun rises and sets in the warmest gradient of colors. Now, lets make this image in your mind even better by adding a great purpose to bring knowledge, connect people, and engulf yourself in the surroundings and you’ve landed in Boževce, Kosovo on GAIAs permaculture estate.
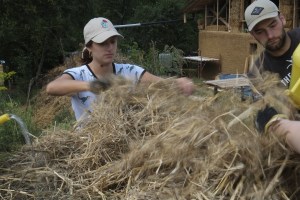
 The first few days were dedicated to getting to know each other, becoming familiar with the property and learning about the principles and ethics of permaculture along with natural building. We learned so much in such a short amount of time; it was exhilariting to take it all in. The staff was so informative and welcomed all questions with no hesitation. I feel one successful aspect during camp, for me, was being taught something in such a condensed way and then putting it right into practice afterwards. We learned about reed beds and it’s function of filtering grey water; then proceeded with making one at site. We also learned about the making of a compost and why we have them and then created one too. The trust in the volunteers to get things done from the staff was so encouraging for the work. We watched a film on the building of a straw bale house and was given some books for further references on the subject of this project we were about to endeavor on. One activity that really stuck out to me during one of the educational sessions was when we were given the task to design a house plan with the new knowledge we had just ingested on building with natural materials. I thought this was extremely fun and even helpful for us, as volunteers, to get creative and really understand how GAIAs permaculture project is impactful.


 Dandelion (Taraxacum officiale): Dandelion grows everywhere in spring. The plant is up to 25 cm high, the flowers are yellow and the leafs are green and look a little bit like teeth. That’s where the name comes from; it means “tooth of lion”. These leafs are very tasty in salads when they are young. The roots are eatable as well, and from the flower you can make a delicious dandelion “honey”.
 Ground elder (Aegopodium podagraria): This plant covers the ground in shady areas which get some water from time to time. Its leafs are always arranged in a group of three and the flower looks like elder, which means that it is white and it is arranged in a creeping with white umbels.
 ll leafs which occur more often near the top of the plant on small branches. The flower is pinkish-purple. It gives your food a lovely Mediterranean taste.
 Stinging Nettle (Urtica dioica): This is a plant almost everybody knows and most of us hate it: Because it hurts you, as soon as you touch it! The leafs are dark green and in a triangular shape and the plant is up to 1.50 m high. The young leafs which do not sting yet are very good in salads and once the plant gets older, you can use it like spinach. But nettle is not only tasty, you can also make a very good fertilizer for your garden with it: Fermented for two or three weeks in water and then sieved, it becomes a good treat for your tomatoes, beetroots and other plants.
 green leafs and all have this typical mint smell. They grow up to 70 cm high and the blossom is slightly violet. A tea from it helps against digestion problems and against a cold.
 and the “edges” which let it look like nettle a little bit. Lemon balm can grow up to 80 cm high and it prefers cool and shady places. The blossom is white-blue, small and not very spectacular. The tea of the leafs is good for treating nervous complaints of stomach, intestine and heart. It is anti-depressant and oil of lemon balm can help to heal wounds.
 they are red-violet and they have darker stripes and five parts. The leafs are parted into five sections. This plant is marvelous as a tea against colds and it strengthens the immune system in general.
 Thyme (Thymus vulgaris): This plant you probably know from pizza. The Italian kitchen is famous for using it which is not astounding since this plant prefers the hot Mediterranean climate. It often grows on rocky places and dry grassland. Thyme basically has tiny leafs and tiny flowers which can appear in different colors. It can be recognized by its characteristic smell. In tea, it helps against colds and in oil it is antibacterial. So if you plan to make your own toothpaste, thyme gives you a good smell and a good outcome in the same time. And of course, it tastes very good on pizza!
 Rue (Ruta graveolens): This perennial plant grows up to 50 cm high. It has yellow flowers in a kind of little “crown” at the top of the plant and it has small and long leafs which are arranged to little “hands”. Rue prefers a rocky and sunny surrounding. It helps against blood pressure and vein problems as well as against epilepsy. Furthermore it is good to have one in your property if you have animals since fleas don’t like its smell and so your animals will be free from them.
 Chamomile (Matricaria chamomilla): This little flower is actually a wonder-healer. The blossom is white with a pretty big and outstanding yellow “ball” in the middle, the leafs look like tiny little feathers. The plant is little itself, it can grow up to 40 cm high, but most of the time it covers the soil on the corner of paths. So watch out, maybe you are stepping on a treasure! The smell is strong and aromatically, and the tea out of the flowers as well. It helps against multiple diseases, first cold, but also womanlike diseases, it brightens up your mood in general and it helps your digestion system. You can also make oil or crèmes for the skin from it and this will calm down irritated skin.
 Plantain (Plantago sp.): This is another plant we are often stepping on and we should pay more attention to: Planatain has either big or thin and long leafs, depending on the type of planatain, but they have in common that each leaf has some strong little strings crossing it in a distance of 2-5 mm. The leafs cover the ground, while the blossom grows up on a long steel and looks cylindrical, up to 7 cm long and covered with little pink or white flowers. Tea of the leafs and the flowers helps against cold, chewing the flowers helps against toothache. If you have a stitch of a bee, you rub a leaf between your fingers until the juice comes out and you put the juice on the stitch. The swelling will disappear.